

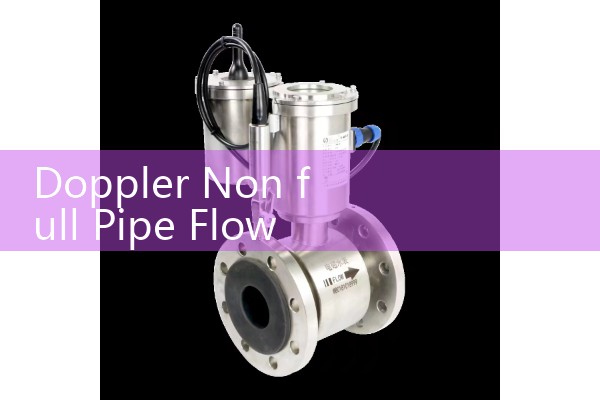
『Doppler non full tube flowmeter』Related information(v cone flow meter|rotary gas meter|gallon meter|gear meter|metal tube rotameter|glass tube rotameter|nutating disk meter|transit time ultrasonic flow meter|wedge flow meter|pd meters|hydraulic flow meter|ultrasonic water flow meter|water flow meter|air flow meter|magnetic water flow meter|oxygen flow meter|gas flow meter|argon flow meter|air velocity meter|gasoline flow meter|fuel flow meter|ultrasonic water meter|digital water meter|nitrogen flow meter|solid flow meter|Oxygen tank flow meter|digital water flow meter|diesel fuel flow meter|steam flow meter|02 flow meter|compressed air flow meter|oil flow meter|liquid flow meter)
How to install and use a portable Doppler ultrasonic flowmeter?
The installation and use of portable Doppler ultrasonic flowmeter should be combined with the equipment principle and operating specifications. Specific operating procedures:
1. Installation steps: Fix the equipment and place the probe. Fix the probe to the bracket, hold the stainless steel measuring rod, and insert the probe into the water.
. Probe direction: Directly facing the direction of water flow, ensuring a smooth and stable water flow in the measurement area. Environmental requirements: There should be no obstacles (such as stones, sediments, garbage, etc.) in front of the probe to avoid interference with measurement accuracy. Applicable scenarios: Suitable for both full pipe and non full pipe environments (such as rivers, channels, and pipelines), the water level section relationship coefficient can be freely set. Figure 1: The probe penetrates deep into the water body and faces the direction of water flow. The device is connected and activated with a portable handheld terminal and a Doppler ultrasonic flowmeter. Power on operation: Long press the "confirm" button for 4 seconds to start the device; Press and hold the back button for 5 seconds to shut down. Initial setting: The device is set uniformly at the factory and the parameters need to be adjusted according to the on-site environment.2. Use the operation parameter setting process to enter the main menu: click the "Return" button. Select flowmeter collection settings: Enter flow preset mode 1. Input on-site parameters: Set parameters such as weir type, width, and height based on the tested watershed environment. Figure 2: Example of parameter setting steps. The mea
III. Technical Features and Advantages Measurement Range: Wheel stove wide flow velocity range of 0.02-5m/s, resolution of 1mm/s, suitable for shallow water and complex flow environments.
. Response speed: High response time, real-time refresh of measurement results, no need for long waiting times. Environmental adaptability: The fluid dynamics shell design reduces interference with the flow state of the water body, ensuring measurement accuracy. Battery life: Equipped with a high-performance lithium battery, it can work continuously for more than 12 hours on a single charge. Portability: A compact and lightweight handheld terminal equipped with a graphical display interface for easy on-site operation.4. Application scenarios: Natural water bodies: open environments such as natural rivers and open channels.
. Engineering monitoring: verification of flow velocity and flow rate in irrigation channels, and monitoring of urban sewage pipe networks. Alternative habit equipment: It can replace the propeller flowmeter and is suitable for measurement needs with low initial speed and wide range. 5. Precautions for probe protection: Avoid contact with hard objects or prolonged exposure to ha Hot News
 Related AD